
Google Drive的时候,默认是使用的官方提供的api,所以高峰期上传文件的时候,由于很多人在用,导致api的流量上限,会出现各种403,ratelimit等错误,最常见的报错提示为:Failed to get file: googleapi: Error 403: Rate Limit Exceeded, rateLimitExceeded,然后目前的解决方法就是使用自己的api。今天和大家分享在VPS上使用Google Drive API挂载Google Drive网盘的方法。
一、安装挂载工具rclone
curl https://rclone.org/install.sh | sudo bash

二、配置rclone
rclone config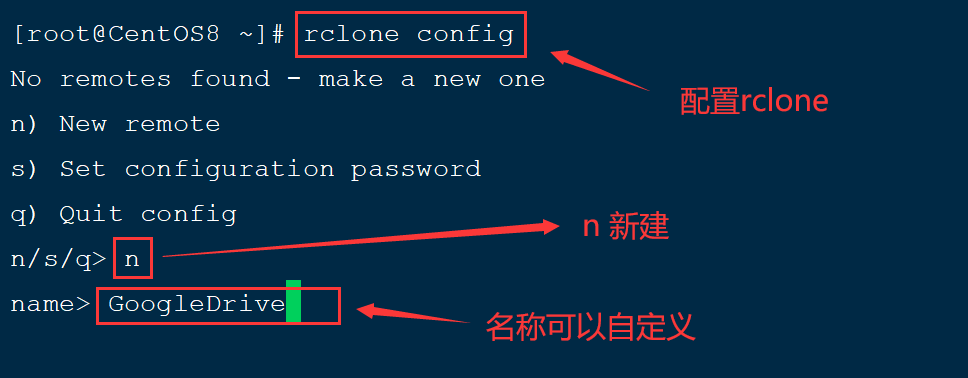
name 可以自定义
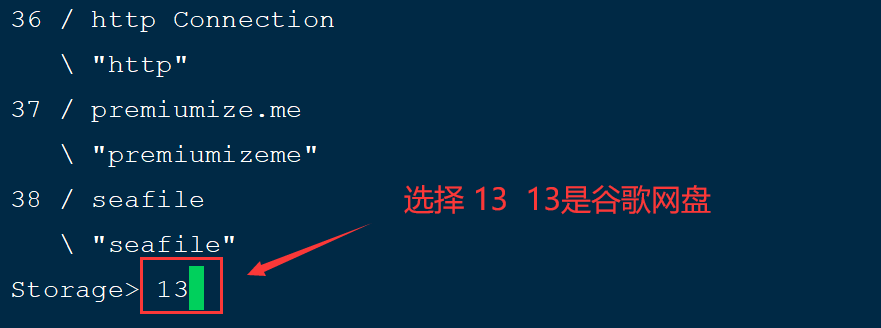
Choose a number from below, or type in your own value
选谷歌 (13) 可能会因为版本的不同而改变 注意选择 Google drive
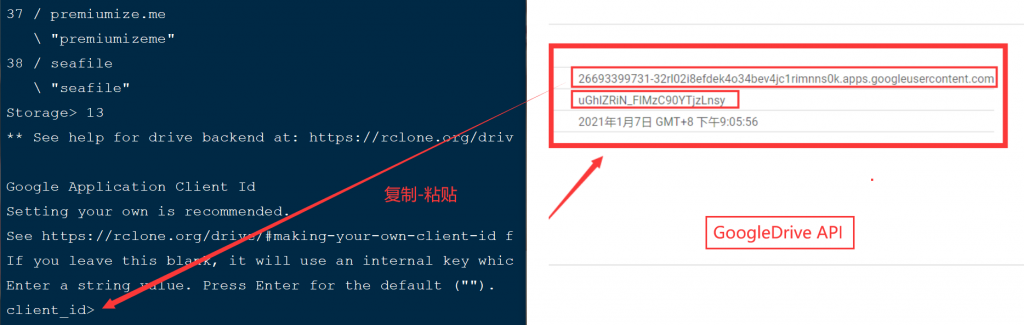
client_id> 可以用自己的Google Drive API的client_id,也可以直接回车
关于Google Drive API的client_id和client_secret的获取方法可以参考这个教程?
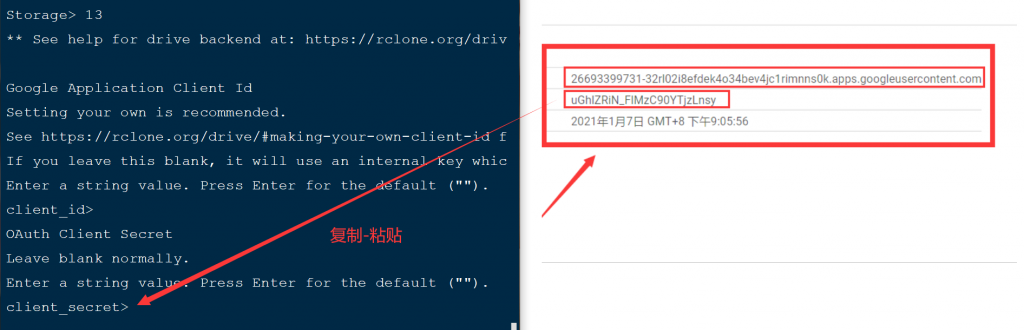
client_secret> 可以用自己的Google Drive API的client_secret,也可以直接回车
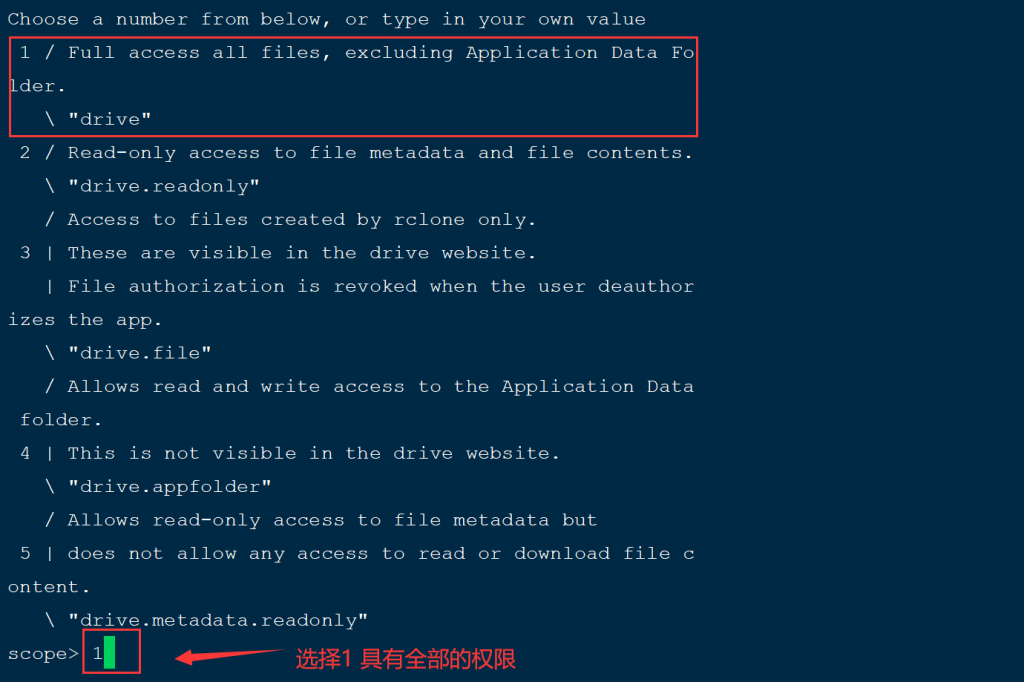
Choose a number from below, or type in your own value
scope> 1 选1 有最大的使用权限。
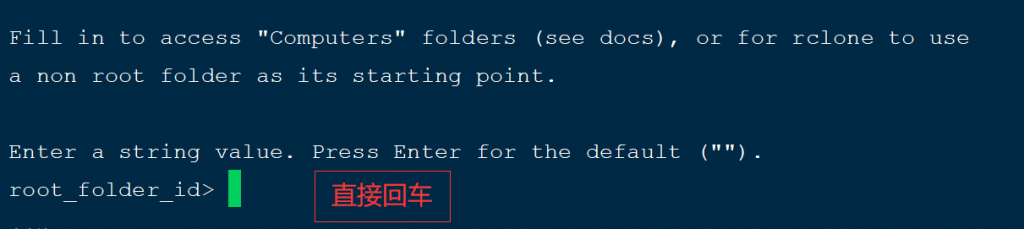
Enter a string value. Press Enter for the default (“”).
root_folder_id> 直接回车
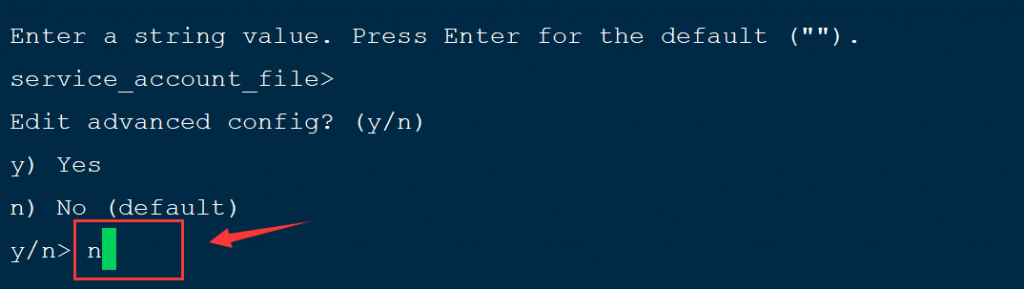
service_account_file> 直接回车

Edit advanced config? (y/n)
y) Yes
n) No (default)
y/n> n #不用别的高级配置
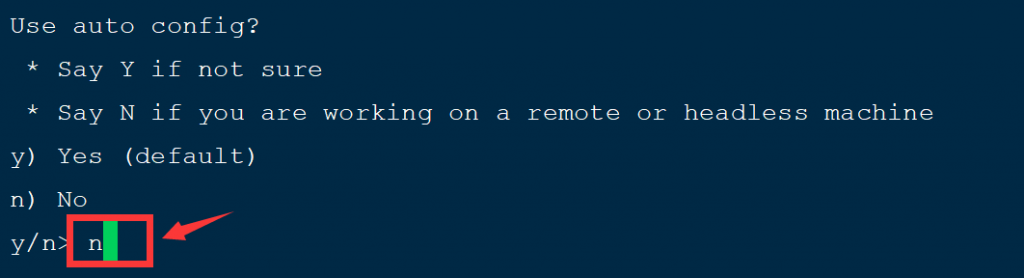
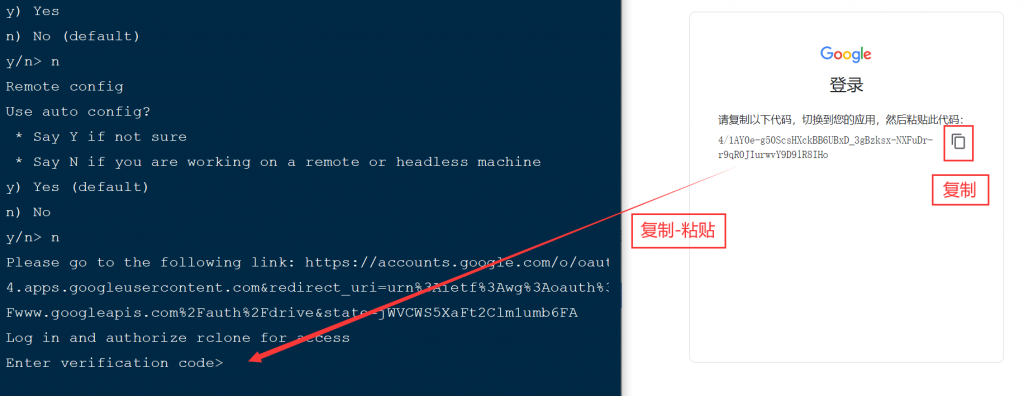
Use auto config?
y/n> n
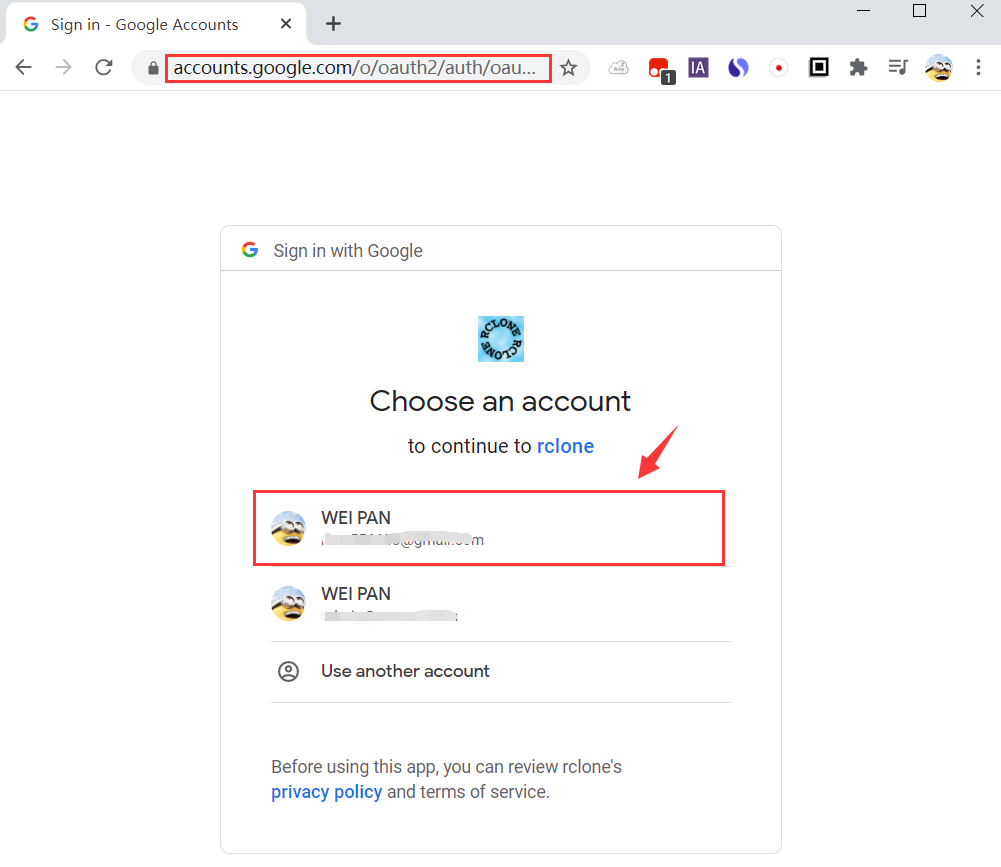
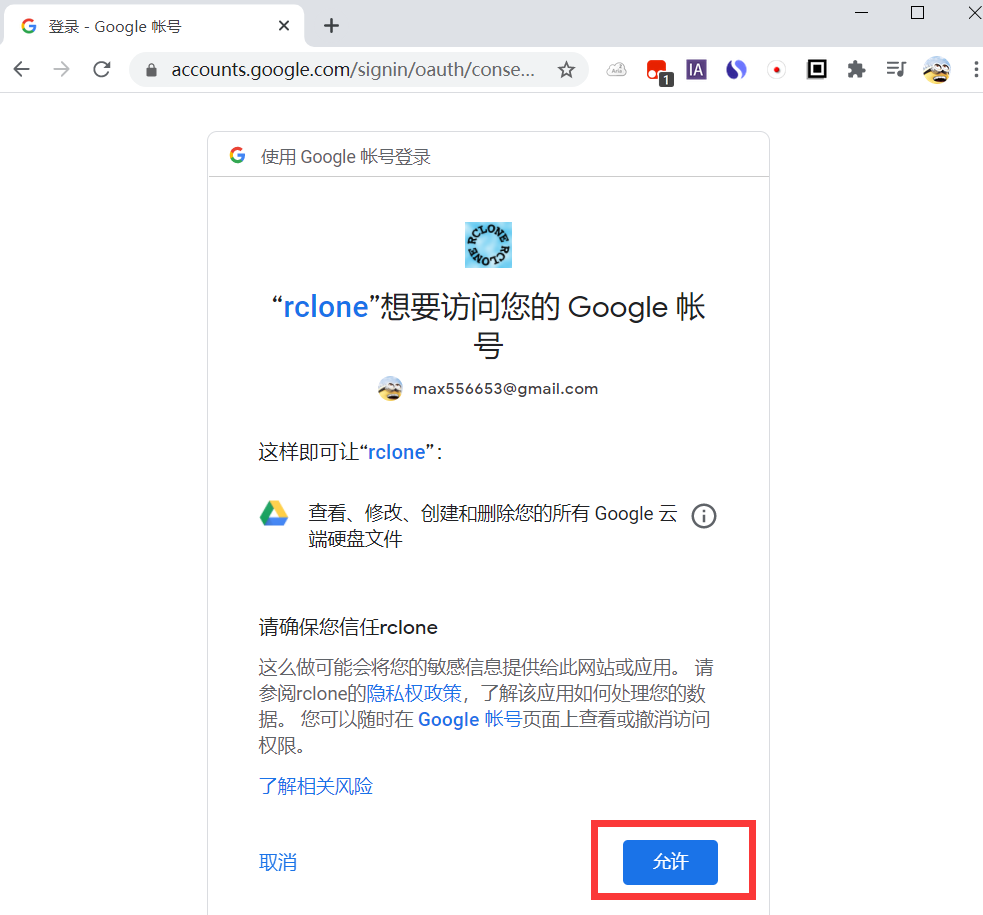
浏览器打开链接登录谷歌账号获取Key
Please go to the following link: https://xxxxxxxxxxxxxxxxxxxxxxxxxxxxxxxxxxxxxxxxxxxxxxxxxxxx
Log in and authorize rclone for access
Enter verification code>贴入你获取到的key

Configure this as a team drive?
y) Yes
n) No (default)
y/n> 挂载共享网盘选择 y 挂载自己的网盘目录选 n

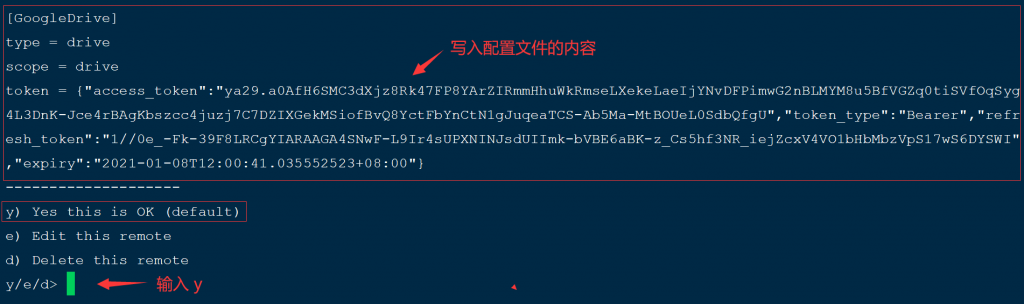
确认配置是否正确
y) Yes this is OK (default)
e) Edit this remote
d) Delete this remote
y/e/d> y
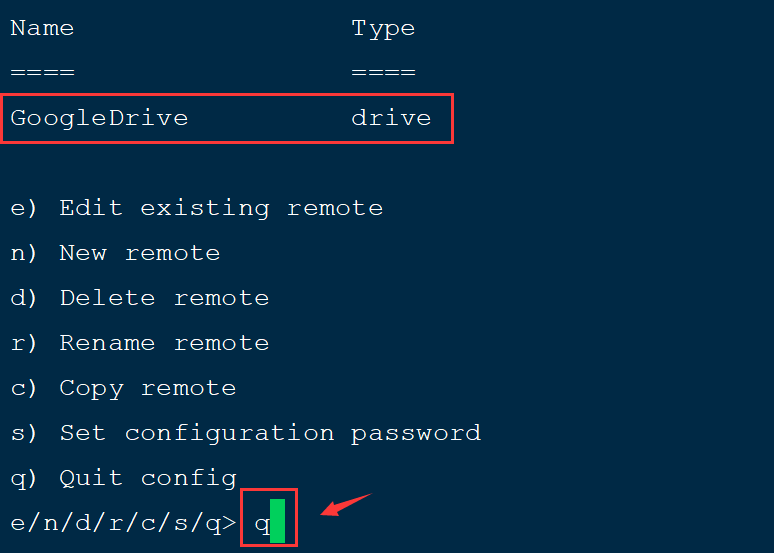
e) Edit existing remote
n) New remote
d) Delete remote
r) Rename remote
c) Copy remote
s) Set configuration password
q) Quit config
e/n/d/r/c/s/q> q
三、挂载Google Drive
1.创建一个/GoogleDrive目录,作为挂载目录
mkdir -p /GoogleDrive
2.挂载
/usr/bin/rclone mount GoogleDrive: /GoogleDrive \
 --umask 0000 \
 --default-permissions \
 --allow-non-empty \
 --allow-other \
 --buffer-size 32M \
 --dir-cache-time 12h \
 --vfs-read-chunk-size 64M \
 --vfs-read-chunk-size-limit 1G &
–后面跟的是参数 可以自己调整
如果如下报错内容:
Fatal error: failed to mount FUSE fs: fusermount: exec: “fusermount”: executable file not found in $PATH
Centos解决办法:
yum install fuse -yDebian/Ubuntu解决办法:
apt-get install fuse -y3.查看挂载
df -h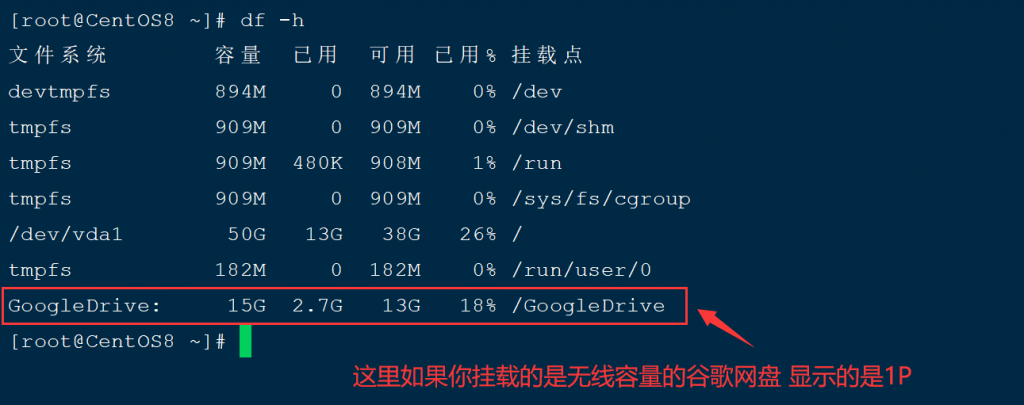
4.设置自动挂载和开机自启动
cat > /etc/systemd/system/rclone.service <<EOF
[Unit]
Description=Rclone
AssertPathIsDirectory=LocalFolder
After=network-online.target

[Service]
Type=simple
ExecStart=/usr/bin/rclone mount GoogleDrive: /GoogleDrive \
 --umask 0000 \
 --default-permissions \
 --allow-non-empty \
 --allow-other \
 --buffer-size 32M \
 --dir-cache-time 12h \
 --vfs-read-chunk-size 64M \
 --vfs-read-chunk-size-limit 1G
ExecStop=/bin/fusermount -u LocalFolder
Restart=on-abort
User=root

[Install]
WantedBy=default.target
EOF
命令执行完毕可以用下面的systemctl命令看来控制rclone挂载
启动
systemctl start rclone开机启动
systemctl enable rclone重新启动
systemctl restart rclone停止
systemctl stop rclone转载自:https://www.unvone.com/72825.html
